The Best Pavlova Recipe | For a Crisp, Cloud-Like Dessert
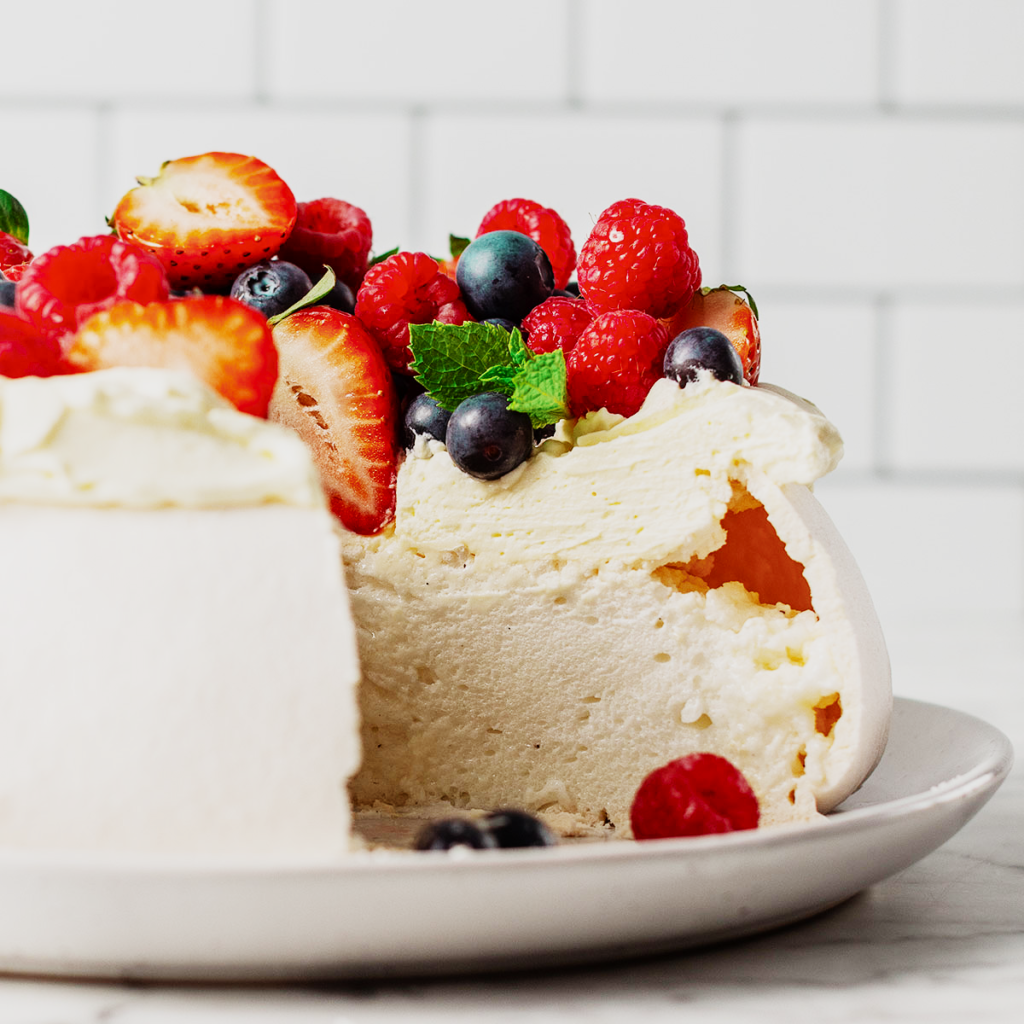
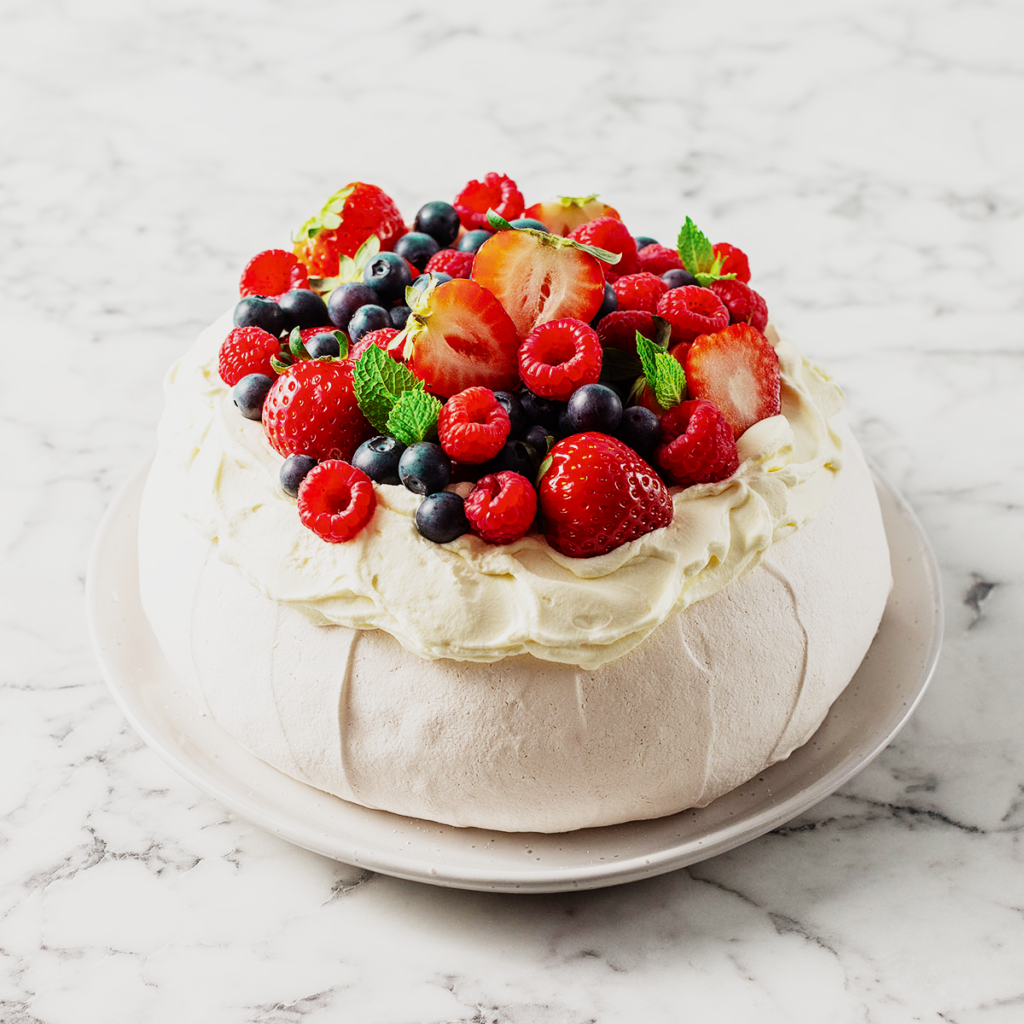
Few desserts feel as elegant yet surprisingly simple as a homemade Pavlova Recipe. With its delicate crisp shell, soft marshmallow-like center, and pillowy whipped cream piled high with fresh fruit, pavlova is the kind of dessert that instantly turns an ordinary gathering into something memorable. It looks impressive on the table, but the process is much more beginner-friendly than you might think.
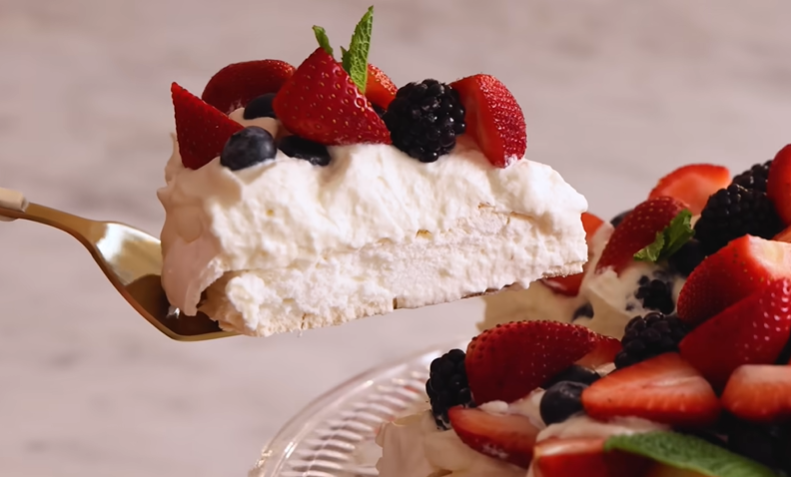
If you have ever admired those beautiful bakery-style meringue desserts and assumed they were too tricky to make at home, this recipe will change your mind. A well-made pavlova has the perfect contrast of textures. The outside should feel light and crisp, while the inside stays soft, airy, and almost melt-in-your-mouth tender. Add fresh berries, kiwi, or your favorite seasonal fruit, and every bite feels fresh, creamy, and balanced.
One of the best things about this easy pavlova recipe is its versatility. Serve it for birthdays, holiday dinners, summer gatherings, or even a quiet weekend treat when you want something a little special. Since the meringue can be made ahead of time, assembling the final dessert is wonderfully stress-free.
In this guide, I will walk you through every step, including simple tips for getting glossy meringue, avoiding cracks, and creating that signature crisp exterior with a soft center. Even if it is your first time making homemade pavlova, you will feel confident from start to finish.
Why You’ll Love This Recipe
- Beautiful bakery-style results at home: This homemade pavlova looks elegant and impressive, yet the process is simple enough for beginner bakers.
- Crisp outside, soft center: The magic of a great pavlova lies in its texture. You get a delicate, crisp shell with a fluffy, marshmallow-soft middle.
- Perfect for make-ahead entertaining: You can prepare the meringue base in advance, making dessert assembly quick and stress-free before guests arrive.
- Easy to customize with toppings: From fresh berries and kiwi to mango, peaches, or chocolate shavings, this pavlova recipe works beautifully with seasonal fruit and creative toppings.
- Naturally gluten-free: Since pavlova is made primarily with egg whites, sugar, and cornstarch, it is naturally gluten-free and ideal for sharing at gatherings.
- Light yet satisfying: Unlike heavier desserts, pavlova feels airy and fresh, especially when paired with lightly sweetened whipped cream and juicy fruit.
- A great recipe for special occasions: Whether it is a dinner party, holiday celebration, birthday, or weekend dessert, pavlova always feels a little extra special without requiring complicated baking skills.
Ingredients
Here is everything you need to make this easy Pavlova Recipe at home.
For the Pavlova Meringue
- 6 large egg whites: Room-temperature egg whites whip up to a higher volume and with greater stability.
- 1½ cups granulated sugar: Helps create structure and gives pavlova its signature crisp exterior.
- 2 teaspoons cornstarch: Essential for that soft, marshmallow-like center.
- 1½ teaspoons lemon juice: Helps stabilize the meringue and creates a smoother texture.
- 1 teaspoon vanilla extract: Adds soft, warm flavor that pairs beautifully with fruit.
For the Whipped Cream Topping
- 1½ cups heavy whipping cream, very cold: Cold cream whips faster and creates a light, fluffy texture.
- 2 tablespoons granulated sugar: Adds gentle sweetness without overpowering the dessert.
- 1 teaspoon vanilla extract (optional): adds a subtle bakery-style flavor to the whipped cream.
For Toppings
- Fresh strawberries, sliced
- Fresh blueberries
- Fresh raspberries
- Kiwi slices
- Fresh mint leaves (optional garnish)
You can also use mango, peaches, blackberries, passion fruit, or any fresh seasonal fruit you love for a colorful pavlova topping.
Ingredient Notes & Substitutions
A few simple ingredient tips can make your Pavlova Recipe even easier and help you get reliable results every time.
Egg Whites
Fresh egg whites work best for stable, fluffy meringue. Be careful not to let any egg yolk mix in, since even a small amount of fat can prevent the whites from whipping properly.
Substitution tip: Carton egg whites are not always reliable for pavlova because they may not whip to stiff peaks. Fresh eggs are the safer choice.
Granulated Sugar
Regular white sugar helps create the glossy meringue texture and crisp shell. Add it gradually while mixing for the smoothest finish.
Budget-friendly option: Standard granulated sugar works perfectly. There is no need for specialty baking sugar.
Cornstarch
Cornstarch helps create the signature soft, marshmallow-like center while keeping the outer shell crisp.
Substitution: Potato starch works well if that is what you have available.
Lemon Juice
A little acidity helps stabilize the egg whites and improves the meringue’s texture.
Easy swaps: White vinegar or cream of tartar can work if you do not have fresh lemon juice.
Vanilla Extract
Vanilla adds gentle warmth and depth to the dessert.
Flavor ideas: Try almond extract for a slightly nutty flavor or lemon extract for a brighter citrus finish. Use a small amount since extracts can be strong.
Heavy Whipping Cream
Cold heavy cream creates a fluffy, creamy topping that balances the sweetness of the pavlova.
Dairy-free option: Use chilled coconut cream for a dairy-free pavlova topping. It gives a lightly rich texture and pairs beautifully with tropical fruit.
Fruit Toppings
Fresh fruit adds color, freshness, and a juicy contrast to the sweet meringue.
Best fruits for pavlova:
- Strawberries
- Blueberries
- Raspberries
- Kiwi
- Mango
- Peaches
- Passion fruit
- Blackberries
For the best texture, avoid overly watery fruit that may soften the pavlova too quickly after assembly.
Kitchen Tools Needed
You do not need fancy equipment to make a beautiful homemade pavlova, but a few helpful tools make the process smoother and more beginner-friendly.
Essential Tools
- Stand mixer or electric hand mixer: Whipping egg whites to stiff peaks takes time, so an electric mixer makes the process much easier. A stand mixer works especially well for glossy meringue.
- Large mixing bowl: Use a completely clean, grease-free bowl so the egg whites whip properly.
- Measuring cups and spoons: Accurate measurements matter for pavlova since baking is all about balance.
- Rubber spatula: Helpful for gently folding in cornstarch, lemon juice, and vanilla without deflating the meringue.
- Baking sheet: A large baking tray gives enough room for air circulation while baking.
- Parchment paper: Prevents sticking and makes it easy to lift the pavlova after baking. Avoid wax paper since it can stick.
Helpful Optional Tools
- Piping bag with a large star tip: Perfect for creating elegant mini pavlovas or decorative edges. A spoon works just as well for a rustic look.
- Offset spatula or spoon: Useful for shaping the center where the whipped cream and fruit will sit.
- Cooling rack: Helps the pavlova cool evenly after baking.
- Kitchen scale: Optional, but helpful if you prefer precise baking measurements.
Before starting, make sure your mixing bowl and beaters are completely dry and free from grease. Even a small amount of oil can affect how well the egg whites whip.
Step-by-Step Instructions
Prep the Oven and Baking Sheet
Preheat your oven to 225°F (107°C). Line a large baking sheet with parchment paper.
If you want evenly sized pavlovas, lightly trace circles on the back of the parchment as a guide. Flip the paper over so the pencil side stays underneath.
Helpful tip: Start with a fully preheated oven. Waiting too long after whipping the meringue can cause it to lose volume.
Whip the Egg Whites
Add the room-temperature egg whites to a clean, dry mixing bowl. Using a stand mixer or hand mixer, beat on medium-high speed until soft peaks form. The mixture should look foamy and soft.
Slowly Add the Sugar
With the mixer running, add the granulated sugar one spoonful at a time. This step is important for a smooth, glossy meringue.
Continue beating for about 8 to 10 minutes, or until the mixture becomes thick and shiny, forming stiff peaks. When you lift the beaters, the peaks should stand upright without drooping.
Texture cue: Rub a small amount between your fingers. It should feel smooth, not grainy. If you still feel sugar crystals, keep mixing for another minute or two.
Fold in Flavor and Stabilizers
Gently fold in the lemon juice, vanilla extract, and cornstarch using a rubber spatula.
Mix just until combined. Overmixing can deflate the airy texture.
Shape the Pavlova
Spoon or pipe the meringue onto the parchment-lined baking sheet into small nests about 3 to 4 inches wide.
Use the back of a spoon to create a shallow indentation in the center. This will hold the whipped cream and fruit later.
Avoid this mistake: Do not overbeat the meringue. Keeping some height helps create that soft marshmallow center.
Bake Low and Slow
Bake for 1 hour and 15 minutes.
The pavlova should look pale and dry on the outside with a crisp shell. Avoid opening the oven door while baking, since sudden temperature changes can cause cracking.
Once baking time is complete, turn the oven off and leave the pavlova inside for 30 minutes with the door closed. This gentle cooling process helps prevent collapse.
Cool Completely
Transfer the baking sheet to a cooling rack and let the pavlovas cool completely.
The outside should feel crisp and delicate, while the center remains slightly soft.
Make the Whipped Cream
In a cold mixing bowl, beat the heavy whipping cream, sugar, and optional vanilla extract until soft, fluffy peaks form.
Be careful not to overwhip, or the cream may become grainy.
Assemble and Decorate
Just before serving, spoon or pipe whipped cream into the center of each pavlova.
Top with fresh berries, kiwi, mango, or your favorite fruit. Finish with fresh mint if desired.
For the best texture, assemble right before serving so the pavlova stays crisp and airy.
Expert Tips
These simple tips can help you master this Pavlova Recipe and give you that beautiful, crisp shell with a soft, fluffy center every time.
Use Room Temperature Egg Whites
Cold egg whites do not whip as efficiently. Let them sit at room temperature for about 20 to 30 minutes before mixing for better volume and stability.
Add Sugar Slowly
Rushing this step is one of the most common pavlova mistakes. Add the sugar gradually, one spoonful at a time, so it fully dissolves into the egg whites. This creates a glossy, smooth meringue instead of a grainy one.
Keep Everything Grease-Free
Egg whites are sensitive to oil and fat. Make sure your mixing bowl, whisk, and spatula are completely clean and dry.
Even a tiny bit of grease can stop the meringue from whipping properly.
Do Not Skip the Cornstarch
Cornstarch is the secret to that signature marshmallow-soft center. Without it, the texture may turn dry and overly crisp.
Avoid Humid Days if Possible
Humidity and pavlova are not great friends. Moisture in the air can quickly soften the crisp shell. If possible, make pavlova on a dry day for the best texture.
Resist Opening the Oven Door
Sudden temperature changes can cause cracks or sinking. Let the pavlova bake undisturbed and cool gradually in the turned-off oven.
Make Whipped Cream Right Before Serving
Fresh whipped cream tastes best and keeps the pavlova light. Adding cream too early can soften the crisp exterior.
Expect a Few Cracks
Small cracks are completely normal and part of pavlova’s rustic charm. Once topped with whipped cream and fresh fruit, they are barely noticeable.
Taste with Seasonal Fruit
Fresh berries are classic, but seasonal fruit can make this dessert feel fresh year-round. Try peaches in summer, citrus in winter, or tropical fruit for a bright twist.
Variations
One of the best things about a homemade Pavlova Recipe is how easy it is to customize. From lighter versions to fun flavor twists, there are plenty of ways to make it your own.
Healthy Version
For a lighter dessert, reduce the amount of whipped cream and load up on fresh fruit. Berries, kiwi, and passion fruit add natural sweetness and bright flavor.
You can also use lightly sweetened Greek yogurt instead of whipped cream for a tangy, creamy topping.
Dairy-Free Pavlova
Swap the whipped cream for chilled coconut cream. It whips into a creamy topping with a subtle tropical flavor that pairs beautifully with mango, pineapple, or berries.
This option keeps the dessert naturally gluten-free and dairy-free.
Chocolate Pavlova
Fold a small amount of cocoa powder into the meringue for a chocolate twist, or drizzle melted dark chocolate over the finished dessert.
Chocolate shavings on top add a beautiful finishing touch.
Citrus Pavlova
Add a little lemon, lime, or orange zest to the whipped cream for a fresh, bright flavor.
Top with citrus segments or berries for a refreshing dessert.
Mini Pavlovas for Parties
Instead of one large pavlova, make individual mini pavlovas. They are perfect for dinner parties, baby showers, or holiday dessert tables, and make serving much easier.
Tropical Fruit Pavlova
Top with sliced mango, kiwi, pineapple, toasted coconut, and passion fruit for a bright tropical version that feels especially refreshing in warmer months.
Berry Lover’s Pavlova
Pile on strawberries, blueberries, raspberries, and blackberries for a colorful dessert with a juicy, slightly tart flavor that beautifully balances the sweet meringue.
Storage Instructions
Pavlova tastes best fresh, but with proper storage, you can prepare parts of the dessert ahead of time and still enjoy a great texture.
How to Store Pavlova
Store the unassembled pavlova shell in an airtight container at room temperature for up to 2 to 3 days.
Keep it in a cool, dry place away from humidity, since moisture can soften the crisp exterior.
Important: Avoid refrigerating plain pavlova shells. The fridge can make the meringue sticky and chewy.
Storing Whipped Cream
Keep whipped cream in an airtight container in the refrigerator for up to 2 days.
If it softens slightly, give it a quick whisk before serving.
Storing Assembled Pavlova
Once assembled with whipped cream and fruit, pavlova is best enjoyed within 4 hours for the best texture.
Over time, the moisture from the toppings will soften the crisp shell.
Can You Freeze Pavlova?
Yes, but only the plain meringue shell.
Let the pavlova cool completely, then place it in an airtight container and freeze for up to 1 month.
To serve, thaw it at room temperature inside the container for a few hours before adding whipped cream and toppings.
Reheating Instructions
Pavlova does not need reheating.
Serve it chilled or at room temperature for the best texture and flavor.

Pavlova Recipe
Ingredients
Method
- Preheat the oven: to 225°F (107°C). Line a baking sheet with parchment paper.Whip the egg whites: in a clean mixing bowl until soft peaks form.Gradually add sugar: one spoonful at a time, beating until stiff, glossy peaks form. The mixture should feel smooth, not grainy.Fold in: lemon juice, vanilla extract, and cornstarch until just combined.Shape the pavlovas: into small nests on the baking sheet. Create a slight indentation in the center for toppings.Bake for 1 hour and 15 minutes: then turn off the oven and leave the pavlova inside for 30 minutes without opening the door.Cool completely: on the baking sheet.Make the whipped cream: by beating cold cream with sugar and vanilla until soft peaks form.Assemble before serving: by topping each pavlova with whipped cream and fresh fruit.
Video
Notes
- Make sure the bowl and whisk are completely grease-free for stable meringue.
- Add sugar slowly for a glossy texture.
- Small cracks are normal and will be covered with toppings.
- Assemble just before serving for the best crisp texture.
- Store plain pavlova shells at room temperature in a dry place.
- Skill Level: Easy to Medium
Nutrition (Per Serving)
- Calories: 210
- Carbohydrates: 31g
- Protein: 2g
- Fat: 9g
- Sugar: 27g
Frequently Asked Questions
Why did my pavlova crack?
Small cracks are completely normal and part of pavlova’s rustic look. Large cracks usually happen from sudden temperature changes or opening the oven door too early. Letting the pavlova cool slowly inside the oven helps prevent this.
Why is my pavlova sticky?
Humidity is often the reason. Pavlova naturally absorbs moisture from the air, which can make the shell feel sticky. Storing it in a dry place helps keep it crisp.
How do I know when the meringue is ready?
The mixture should look thick, glossy, and hold stiff peaks. Rub a little between your fingers. If it still feels grainy, keep mixing until the sugar dissolves.
Can I make pavlova ahead of time?
Yes. You can make the pavlova shell 2 to 3 days in advance and store it in an airtight container at room temperature. Add whipped cream and fruit just before serving.
Can I use frozen fruit?
Fresh fruit is best for texture and appearance, but frozen fruit can work if fully thawed and drained well. Too much extra moisture may soften the pavlova.
Why did my pavlova collapse?
A collapsed pavlova can happen if the meringue is under-whipped, the sugar is added too quickly, or the dessert cools too quickly. Baking low and letting it cool gradually usually gives the best results.
Is pavlova gluten-free?
Yes, traditional pavlova is naturally gluten-free because it is made with egg whites, sugar, cornstarch, and cream. Always double-check ingredient labels if needed for dietary concerns.
Can I make one large pavlova instead of mini pavlovas?
Absolutely. Shape the meringue into one larger circle and create a shallow center for toppings. You may need to increase the baking time slightly, depending on the size.
Final Thoughts
There is something undeniably special about serving a homemade Pavlova Recipe. From the delicate crisp shell to the soft, cloud-like center topped with creamy whipped cream and fresh fruit, every bite feels light, elegant, and wonderfully balanced.
What makes this dessert even better is how approachable it really is. With a few simple ingredients and the right tips, you can create a bakery-worthy pavlova right in your own kitchen, even if it is your first time working with meringue. Whether you keep it classic with berries or try a seasonal twist, it is a dessert that always feels a little memorable.
If you make this pavlova, I would love to hear how it turned out for you. Try your favorite toppings, make it your own, and share your experience in the comments. Happy baking!
Hi, I’m Connie Hope, a passionate home cook, writer, and food enthusiast who discovered the joy of cooking while sitting beside my mother in the kitchen. From learning how to blend spices and herbs to creating flavorful appetizers, homemade soups, salsas, chutneys, jellies, and jams, cooking has always been a creative journey for me.
I believe that the right side dishes can transform an ordinary meal into something truly memorable. Through my cookbook, In Addition…to the Entree, I aim to help families put delicious meals together quickly, easily, and enjoyably. Instead of eating out every night, why not discover the fun of home cooking with a little help from Connie?
Beyond cooking, I also enjoy growing orchids, reading, writing, researching, and organizing my class reunion projects.
📌 Connect with me:
Facebook: www.facebook.com/CookingByConnie
LinkedIn: www.linkedin.com/in/cookingbyconnie
Blog: cookingbyconnie.blogspot.com
About me: www.blogger.com/profile