Easy Pie Crust Recipe | With a Rich Buttery Flavor
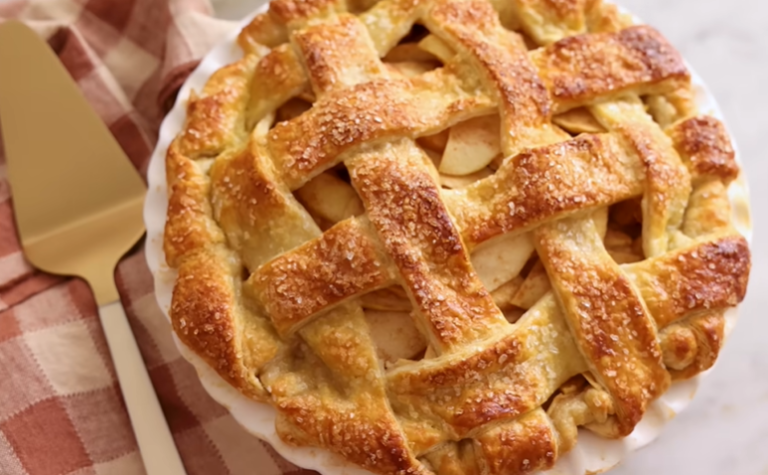
A great pie starts with an exceptional crust, and this pie crust recipe delivers everything you could want in a homemade pastry. It bakes up beautifully golden with delicate flaky layers, a rich buttery taste, and a tender texture that complements both sweet and savory fillings.
Many home bakers feel intimidated by making pie dough from scratch, but the process is much simpler than it seems. With just a handful of pantry staples and a few easy techniques, you can create a homemade pie crust that tastes far better than anything from the freezer aisle. The secret lies in keeping the ingredients cold and handling the dough gently, which helps create those irresistible flaky layers every baker loves.
Whether you’re preparing a classic apple pie, a holiday pumpkin pie, a savory chicken pot pie, or a fresh fruit tart, this all-butter pie crust recipe provides a reliable foundation every time. It’s easy enough for beginners, dependable enough for experienced bakers, and versatile enough to become your go-to pie dough for every occasion.
In this guide, you’ll learn exactly how to make pie crust from scratch, along with helpful tips, troubleshooting advice, and storage methods to ensure perfect results from the very first try.
Why You’ll Love This Recipe
There’s a reason this pie crust recipe becomes a favorite for so many home bakers. It strikes the perfect balance between simplicity and bakery-quality results.
- Wonderfully flaky texture: Cold butter creates delicate layers that bake into a crisp, flaky crust with every bite.
- Rich, buttery flavor: Made with real butter rather than shortening, this crust has a deep, homemade taste that enhances any filling.
- Easy for beginners: You don’t need advanced baking skills or special techniques to make a beautiful pie crust from scratch.
- Made with simple ingredients: Everything you need is likely already in your kitchen, making this an affordable and convenient recipe.
- Perfect for sweet and savory pies: Use it for apple, pumpkin, and pecan pies, quiche, chicken pot pie, and countless other recipes.
- Freezer-friendly: Prepare the dough ahead of time and store it for future baking projects.
- No shortening required: This all-butter pie dough delivers excellent flavor and texture without relying on additional fats.
- Rolls out beautifully: The dough is easy to handle after chilling, making it simple to shape and transfer to your pie dish.
- Reliable results every time: With a few easy tips, you’ll consistently achieve a tender, flaky homemade pie crust.
- Customizable for different recipes: You can easily adapt this basic pie dough for decorative crusts, lattice tops, hand pies, and more.
Ingredients
This recipe makes enough dough for two single-crust pies or one double-crust pie.
For the Pie Dough
- 2 ½ cups all-purpose flour
- 1 tablespoon granulated sugar
- ½ teaspoon fine sea salt
- 1 cup unsalted butter, cold and cut into small cubes
- 7 to 8 tablespoons of ice water
Optional for Rolling
- Extra all-purpose flour for dusting the work surface
- A small amount of flour for the rolling pin
Why These Ingredients Matter
All-Purpose Flour: Provides the structure needed for a tender yet sturdy crust.
Sugar: Adds a subtle touch of flavor and helps promote a lightly golden color during baking.
Sea Salt: Balances the richness of the butter and enhances the overall flavor.
Cold Unsalted Butter: The key to creating flaky layers. As the butter melts in the oven, it creates small pockets that make the crust light and tender.
Ice Water: Helps bring the dough together while keeping the butter cold, which is essential for a flaky pie crust.
Ingredient Notes & Substitutions
One of the best things about this pie crust recipe is its flexibility. While the original ingredients provide the best texture and flavor, a few substitutions work well when needed.
Flour Options
- All-purpose flour is the most reliable choice for a tender, flaky crust.
- For a slightly nuttier flavor, replace up to ½ cup of the all-purpose flour with whole wheat flour.
- If you need a gluten-free option, use a high-quality 1:1 gluten-free baking flour blend.
Butter Choices
- Unsalted butter gives you full control over the salt level in the recipe.
- If using salted butter, reduce the added salt by about half.
- European-style butter can offer an even richer flavor due to its higher butterfat content.
Sugar Adjustments
- Granulated sugar adds a subtle sweetness without making the dough taste sweet.
- For savory pies such as quiche or chicken pot pie, you can reduce the sugar slightly or leave it out altogether.
Water Tips
- Ice-cold water is essential for keeping the butter firm while mixing the dough.
- Add the water gradually. The exact amount may vary depending on humidity and the type of flour used.
Dairy-Free Alternative
- Replace the butter with a high-quality plant-based butter designed for baking.
- Choose a product that remains firm when chilled for the best flaky texture.
Lower-Sodium Option
- Reduce the salt slightly if you are watching your sodium intake.
- Avoid removing it completely since salt plays an important role in flavor development.
Budget-Friendly Tips
- Store-brand butter and flour work perfectly well in this recipe.
- Buying butter in larger packages during holiday sales can help reduce baking costs year-round.
Common Substitution Mistakes to Avoid
- Do not use melted or softened butter.
- Avoid adding too much water, which can make the dough sticky and tough.
- Skip self-rising flour, as it contains leavening agents that can affect the crust’s texture.
Kitchen Tools Needed
You do not need a professional baking setup to make a great homemade pie crust. A few basic kitchen tools are all it takes.
Essential Tools
- Large mixing bowl
- Measuring cups and measuring spoons
- Rolling pin
- Sharp knife for cutting butter
- Plastic wrap or reusable food wrap
- 9-inch pie dish
- Fork
Helpful Optional Tools
Food Processor: Makes it quick and easy to cut the butter into the flour while keeping everything cold.
Pastry Cutter: A great alternative if you prefer making pie dough by hand.
Bench Scraper: Useful for lifting and moving dough from the work surface without tearing it.
Silicone Baking Mat: Provides a non-stick surface for rolling out dough and makes cleanup easier.
Pie Weights: Helpful for blind-baking a pie crust to prevent puffing and shrinking.
Parchment Paper: Used during blind baking to hold pie weights, dry beans, or rice in place.
Nice-to-Have Tools for Decorative Crusts
- Pastry wheel
- Small cookie cutters
- Lattice cutter
- Decorative pie crust stamps
These tools are completely optional, but they can add a beautiful homemade touch to your finished pie.
Step-by-Step Instructions
Follow these simple steps for a flaky, buttery pie crust that bakes beautifully every time.
Step 1: Combine the Dry Ingredients
In a large bowl or food processor, combine:
- 2½ cups all-purpose flour
- 1 tablespoon sugar
- ½ teaspoon salt
Mix until evenly distributed.
Tip: Properly measuring the flour helps prevent a dry, dense crust. Spoon the flour into the measuring cup and level it off rather than scooping directly from the bag.
Step 2: Cut in the Cold Butter
Add the cold cubed butter to the flour mixture.
Using a food processor, pulse several times until the mixture resembles coarse crumbs with some pea-sized pieces of butter still visible.
If mixing by hand, use a pastry cutter to work the butter into the flour.
Visual Cue: The mixture should look crumbly and uneven, not smooth like cookie dough.
Avoid: Overmixing the butter into the flour. Visible pieces of butter are what create flaky layers during baking.
Step 3: Add the Ice Water
Sprinkle 7 tablespoons of ice water over the mixture.
Mix gently until the dough begins to clump together.
If the dough seems too dry, add additional ice water one teaspoon at a time.
Texture Cue: When squeezed in your hand, the dough should hold together without feeling wet or sticky.
Step 4: Form the Dough
Turn the mixture onto a lightly floured work surface.
Gather it together with your hands and gently press it into a rough mound.
Fold the dough over itself a few times until it holds together.
Do not knead it like bread dough.
Important: The dough should still look slightly rough with visible butter pieces throughout.
Step 5: Divide and Chill
Divide the dough into two equal portions.
Shape each portion into a flat disk about 1 inch thick.
Wrap tightly in plastic wrap and refrigerate for at least 1 hour.
- Why Chill? Chilling allows the flour to hydrate and helps the butter firm up, making the dough easier to roll and helping create a flaky crust.
Step 6: Roll Out the Dough
- Remove one dough disk from the refrigerator.
- If it feels very firm, let it sit at room temperature for 10 to 15 minutes.
- Lightly flour your work surface and rolling pin.
- Roll the dough into a circle about 12 inches wide and roughly ⅛ inch thick.
- Rotate the dough occasionally while rolling to prevent sticking.
Step 7: Transfer to the Pie Dish
- Carefully roll the dough around the rolling pin and lift it into a 9-inch pie plate.
- Gently unfold it and press it into the bottom and sides of the dish.
- Avoid overstretching the dough, as this can cause it to shrink during baking.
- Trim any excess dough, leaving about 1 inch hanging over the edge.
- Fold the excess underneath itself to create a thicker border.
Step 8: Crimp the Edges
Use your fingers or a fork to decorate the edge of the crust.
For a classic fluted edge:
- Use two fingers on one hand to pinch the dough.
- Press between them with a finger from your other hand.
- Continue around the entire rim.
Step 9: Fill or Blind Bake
At this point, your pie crust is ready for your chosen recipe.
For recipes that require a pre-baked crust:
- Place the prepared crust in the freezer for 20 to 30 minutes.
- Line it with parchment paper.
- Fill with pie weights, dried beans, or uncooked rice.
- Bake at 425°F (220°C) for 15 to 17 minutes.
- Remove the weights and parchment paper.
- Prick the bottom lightly with a fork.
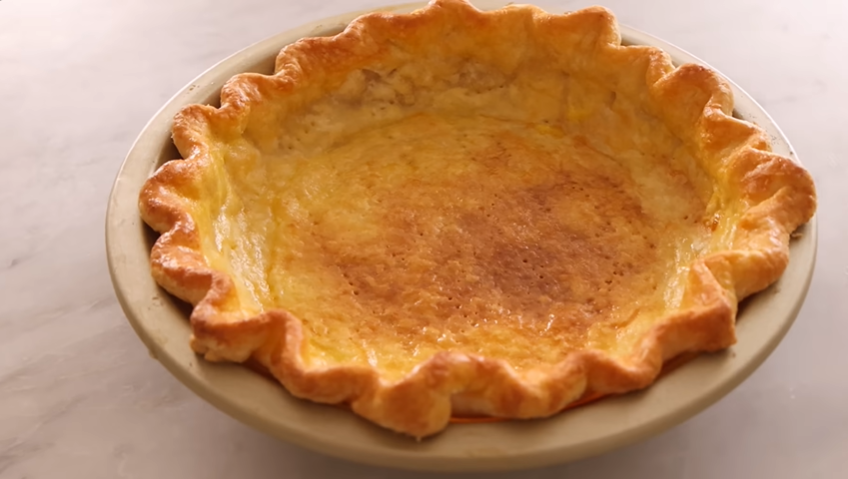
- Return to the oven for 5 to 7 minutes until lightly golden.
Common Mistakes to Avoid
- Using warm butter
- Adding too much water
- Overworking the dough
- Skipping the chilling time
- Stretching the dough into the pie plate
- Over-flouring the work surface
Following these steps will give you a tender, flaky homemade pie crust that works beautifully for fruit pies, cream pies, quiches, and savory pie recipes alike.
Expert Tips
A few small techniques can make the difference between a good pie crust and a truly exceptional one. These tips will help you achieve consistent results every time.
Keep Everything Cold
Cold ingredients are the foundation of a flaky pie crust. Use butter straight from the refrigerator and ice-cold water when mixing the dough.
For extra insurance, chill your mixing bowl and food processor bowl for a few minutes before starting.
Don’t Overwork the Dough
Mix only until the dough comes together. Excess handling can cause gluten to form, making the crust tough rather than tender.
A slightly shaggy dough is perfectly normal and often produces the best texture.
Leave Some Butter Pieces Visible
Tiny chunks of butter throughout the dough create steam as the crust bakes. This steam forms the flaky layers that make homemade pie crust so special.
If the mixture looks completely smooth, the butter has likely been mixed in too much.
Chill Before Rolling
Even if you’re short on time, do not skip the chilling step.
Cold dough is easier to handle, less likely to stick, and helps prevent shrinking during baking.
Rotate While Rolling
Turn the dough a quarter turn every few rolls as you roll it with the rolling pin.
This helps maintain an even circular shape and prevents sticking to the work surface.
Use Just Enough Flour
A light dusting of flour is helpful, but too much extra flour can make the dough dry.
Brush away excess flour before placing the dough into the pie dish.
Prevent a Soggy Bottom Crust
For pies with juicy fillings:
- Chill the prepared crust before filling.
- Blind bake when the recipe recommends it.
- Place the pie on a preheated baking sheet for extra bottom heat.
Freeze Before Baking
After shaping the crust, place it in the freezer for 15 to 20 minutes before baking.
This simple step helps the crust hold its shape and creates flakier layers.
Bake Until Truly Golden
A pale crust often means underbaked pastry.
Allow the crust to develop a rich golden-brown color for the best texture and flavor.
Make Dough Ahead of Time
Pie dough actually benefits from resting.
Preparing it a day in advance gives the flour time to fully hydrate, often resulting in easier rolling and a more tender finished crust.
Variations
One of the best things about this pie crust recipe is how easy it is to customize. Whether you’re looking for a healthier option, a dairy-free alternative, or a unique flavor twist, these variations can help you make the recipe your own.
Whole Wheat Pie Crust
For a heartier texture and slightly nutty flavor, replace up to half of the all-purpose flour with whole wheat flour.
This variation pairs especially well with apple, pear, and savory pies.
Dairy-Free Pie Crust
Substitute the butter with a high-quality dairy-free baking butter.
Be sure to keep it cold, just as you would regular butter, to maintain a flaky texture.
Gluten-Free Pie Crust
Use a trusted 1:1 gluten-free flour blend designed for baking.
The dough may feel slightly more delicate, so handle it gently when rolling and transferring.
Sweet Pie Crust
Increase the sugar to 2 tablespoons for desserts such as fruit, custard, and cream pies.
A little extra sweetness can complement dessert fillings beautifully.
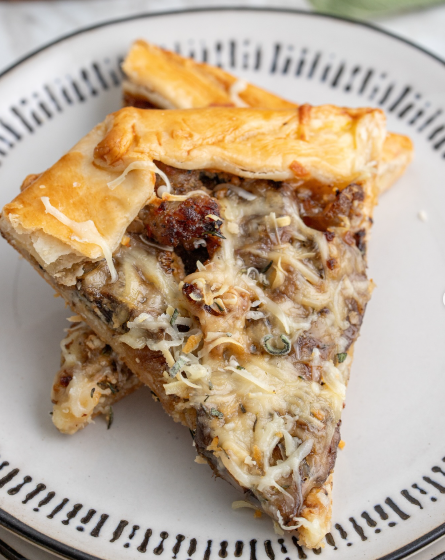
Savory Pie Crust
Reduce or omit the sugar and add a pinch of dried herbs such as:
- Thyme
- Rosemary
- Sage
- Italian seasoning
This variation works well for quiche, pot pies, and savory tarts.
Cinnamon Pie Crust
Add ½ teaspoon ground cinnamon to the dry ingredients.
The subtle spice pairs wonderfully with apple, pumpkin, and pecan pie fillings.
Almond-Flavored Pie Crust
Mix in ¼ teaspoon almond extract along with the ice water for a delicate nutty aroma that complements many fruit pies.
Rustic Hand Pie Dough
Use the same dough to make:
- Hand pies
- Turnovers
- Galettes
- Mini fruit pastries
The buttery texture works beautifully in a variety of baked treats.
Extra-Rich Pie Crust
Replace 2 tablespoons of the ice water with cold sour cream.
This creates an especially tender dough with a slightly richer flavor.
Decorative Holiday Pie Crust
Use cookie cutters to create shapes from extra dough scraps and place them on top of your pie before baking.
Leaves, stars, hearts, and seasonal designs can add a beautiful homemade touch for special occasions.
Storage Instructions
Homemade pie crust stores exceptionally well, making it a great make-ahead recipe for busy baking days and holiday preparations.
Refrigerator Storage
- Wrap each dough disk tightly in plastic wrap or place it in an airtight container.
- Store in the refrigerator for up to 3 days.
- Before rolling, allow the dough to sit at room temperature for about 10 to 15 minutes if it feels too firm.
Freezer Storage
- Wrap each dough disk in plastic wrap.
- Add an extra layer of aluminum foil or place the wrapped dough in a freezer-safe bag.
- Freeze for up to 3 months.
For best results, label the package with the date before freezing.
How to Thaw Frozen Pie Dough
- Transfer the dough from the freezer to the refrigerator.
- Let it thaw overnight.
- Once thawed, allow it to rest at room temperature for 10 to 15 minutes before rolling.
Avoid thawing the dough in the microwave, as it can unevenly soften the butter and affect the texture.
Storing Rolled-Out Pie Crust
If you’ve already rolled and fitted the dough into a pie dish:
- Cover it tightly with plastic wrap.
- Refrigerate for up to 24 hours before baking.
- For longer storage, freeze the prepared crust directly in the pie plate for up to 1 month.
Storing a Baked Pie Crust
A fully baked pie crust can be stored:
- At room temperature for up to 2 days, covered loosely.
- In the refrigerator for up to 5 days in an airtight container.
Allow the crust to cool completely before storing to prevent condensation and sogginess.
Reheating a Baked Pie Crust
If the crust loses some of its crispness:
- Preheat the oven to 350°F (175°C).
- Place the crust on a baking sheet.
- Warm for 5 to 8 minutes.
- Allow it to cool slightly before filling or serving.
This quick refresh helps restore a crisp, flaky texture.
Ingredients
Method
- In a large bowl or food processor, combine the flour, sugar, and salt.Add the cold cubed butter and mix until the mixture resembles coarse crumbs with some pea-sized butter pieces remaining.Add 7 tablespoons of ice water and mix until the dough begins to come together.If needed, add additional water one teaspoon at a time until the dough holds together when pressed.Transfer the dough to a lightly floured surface and gently gather it into a ball.Divide the dough into two equal portions and flatten each into a disk.Wrap tightly and refrigerate for at least 1 hour.Roll the chilled dough into a 12-inch circle on a lightly floured surface.Transfer to a 9-inch pie dish and shape as desired.Fill according to your recipe or blind bake if needed.
Video
Notes
- Always use cold butter and ice water for the flakiest texture.
- Avoid overworking the dough to keep the crust tender.
- Chill the dough thoroughly before rolling.
- For blind baking, use pie weights, dried beans, or uncooked rice.
- Dough can be refrigerated for up to 3 days or frozen for up to 3 months.
- Skill Level: Easy
Nutrition (Per Serving)
- Calories: 230
- Carbohydrates: 20g
- Protein: 2g
- Fat: 15g
- Saturated Fat: 9g
- Cholesterol: 38mg
- Sodium: 100mg
- Fiber: 1g
- Sugar: 1g
Frequently Asked Questions
Why is my pie crust tough instead of flaky?
A tough pie crust is usually caused by overmixing or adding too much water. Handle the dough gently and mix only until it comes together.
Can I make a pie crust without a food processor?
Yes. A pastry cutter, two knives, or even your fingertips can be used to work the butter into the flour. Just be careful not to warm the butter too much.
Why does my pie crust shrink while baking?
Shrinking often happens when the dough is stretched to fit the pie dish or when it isn’t chilled long enough before baking.
How do I know if I’ve added enough water?
The dough should hold together when squeezed in your hand, but should not feel wet or sticky. Add water gradually until the dough reaches this stage.
Can I freeze pie crust dough?
Absolutely. Properly wrapped pie dough can be frozen for up to 3 months and thawed in the refrigerator before use.
What is blind baking?
Blind baking is the process of partially or fully baking a pie crust before adding the filling. It is commonly used for custard pies, cream pies, quiches, and other recipes with wet fillings.
Do I need pie weights for blind baking?
Pie weights are helpful, but dried beans or uncooked rice can be used as substitutes. They help prevent the crust from puffing up during baking.
Can I use salted butter instead of unsalted butter?
Yes. If using salted butter, reduce the recipe’s added salt to maintain a balanced flavor.
How thick should I roll out pie dough?
Aim for about ⅛ inch thickness. This provides a sturdy crust while still allowing it to bake up light and flaky.
Can this pie crust be used for both sweet and savory recipes?
Yes. This versatile pie crust recipe works beautifully for fruit pies, pumpkin pie, pecan pie, quiche, chicken pot pie, and many other baked dishes.
Why are there visible butter pieces in my dough?
Small pieces of butter are a good sign. As the butter melts during baking, it creates steam pockets that form flaky layers throughout the crust.
Can I prepare the dough a day ahead?
Yes. In fact, many bakers prefer making pie dough the day before because the resting time improves texture and makes rolling easier.
Final Thoughts
There’s something incredibly satisfying about making a pie completely from scratch, and it all starts with a great crust. This pie crust recipe is simple, reliable, and designed to give you buttery flavor and flaky layers every time you bake.
Whether you’re preparing a classic fruit pie for a family gathering, a rich holiday dessert, or a savory homemade quiche, this versatile dough provides the perfect foundation. With just a few basic ingredients and some simple techniques, you can create a crust that tastes far better than most store-bought options.
The key is to keep the ingredients cold, handle the dough gently, and allow enough time for chilling. Once you master these basics, homemade pie crust becomes an easy skill you’ll use again and again.
I hope this recipe helps make your baking a little more enjoyable and a lot more delicious. If you give this pie crust recipe a try, share your experience and let us know what kind of pie you make. Your tips, variations, and favorite fillings may inspire other home bakers as well.
Happy baking!

Hi, I’m Connie Hope, a passionate home cook, writer, and food enthusiast who discovered the joy of cooking while sitting beside my mother in the kitchen. From learning how to blend spices and herbs to creating flavorful appetizers, homemade soups, salsas, chutneys, jellies, and jams, cooking has always been a creative journey for me.
I believe that the right side dishes can transform an ordinary meal into something truly memorable. Through my cookbook, In Addition…to the Entree, I aim to help families put delicious meals together quickly, easily, and enjoyably. Instead of eating out every night, why not discover the fun of home cooking with a little help from Connie?
Beyond cooking, I also enjoy growing orchids, reading, writing, researching, and organizing my class reunion projects.
📌 Connect with me:
Facebook: www.facebook.com/CookingByConnie
LinkedIn: www.linkedin.com/in/cookingbyconnie
Blog: cookingbyconnie.blogspot.com
About me: www.blogger.com/profile